In about two weeks Qt World Summit 2018 in Boston will open the doors and I just published the first release of the Conference App to the App Stores. You can download the Conference App from Google Play Store:
![]() or Apple App Store:
or Apple App Store:
![]()
The source code can be found at GitHub.The Conference App is built using QtQuickControls 2 for Android and iOS. Two years ago I developed the QtCon 2016 and the Qt World Summit 2016 Apps. The 2018 App is an update. To understand some of the concepts please take a look at the Qt Blog about 2016 Conference App and my blog post about QtCon 2016 App where I explained navigation, dynamic loading, caching and data binding.
What's new?
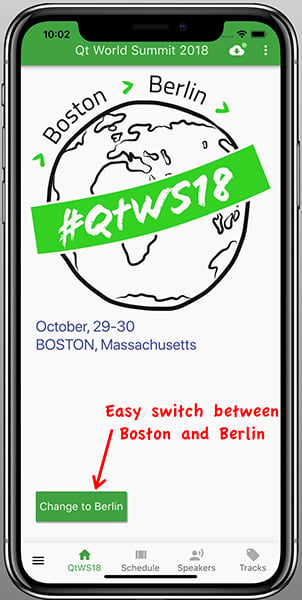
Qt World Summit 2018 Conference App covers two conferences:
• QtWS2018 Boston (2018-10-29 … 30)
• QtWS2018 Berlin (2018-12-05 … 06)
Starting the app, the first conference in Boston is selected and you can easily switch between the schedules for Boston and Berlin. Later when Boston is finished, Berlin will be selected.
The schedule shows all Sessions for the selected conference and you can swipe through the days or tap on the Tab.
Hint: as of today (2018-10-12) the schedule for the training day in Berlin is missing, but will follow soon. There's an automatic version check to see if the server has new or changed data, so you'll always get the updates.
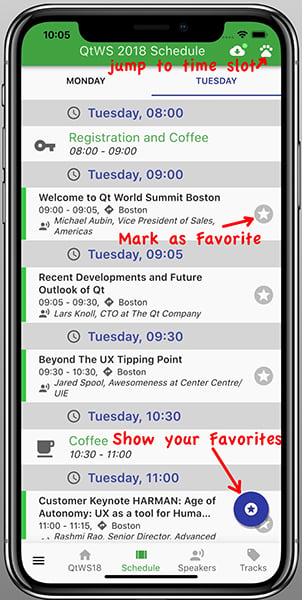
Tapping on a row from schedule list you get the session details:
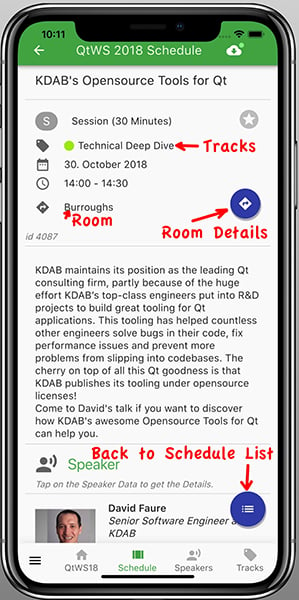
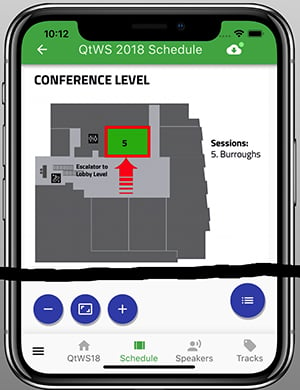
You want to know where the room is located ? Tap on the Button to see the room details:
There's also a list about all speakers. This list contains speakers from Boston and Berlin.
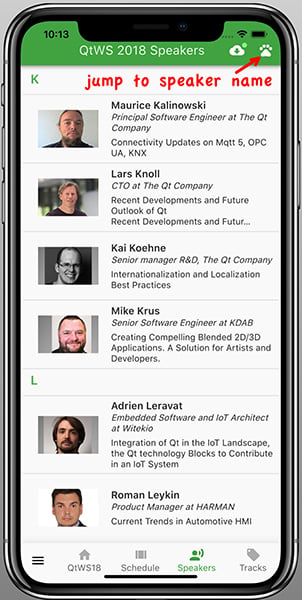
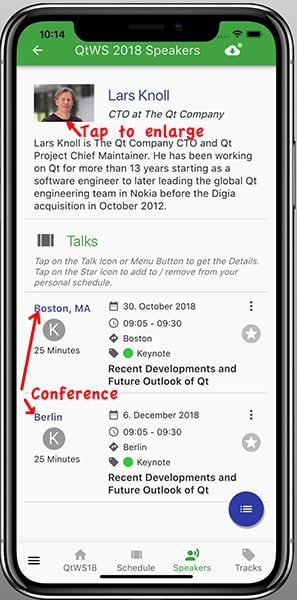
Select a Speaker to get the details:
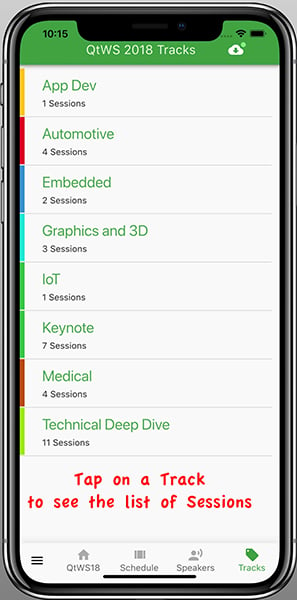
The Sessions and Keynotes are grouped by Tracks with different colors:
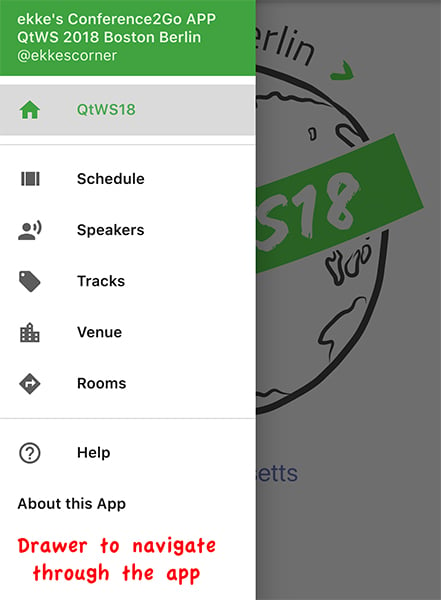
Use the Drawer to navigate through all parts of the app:
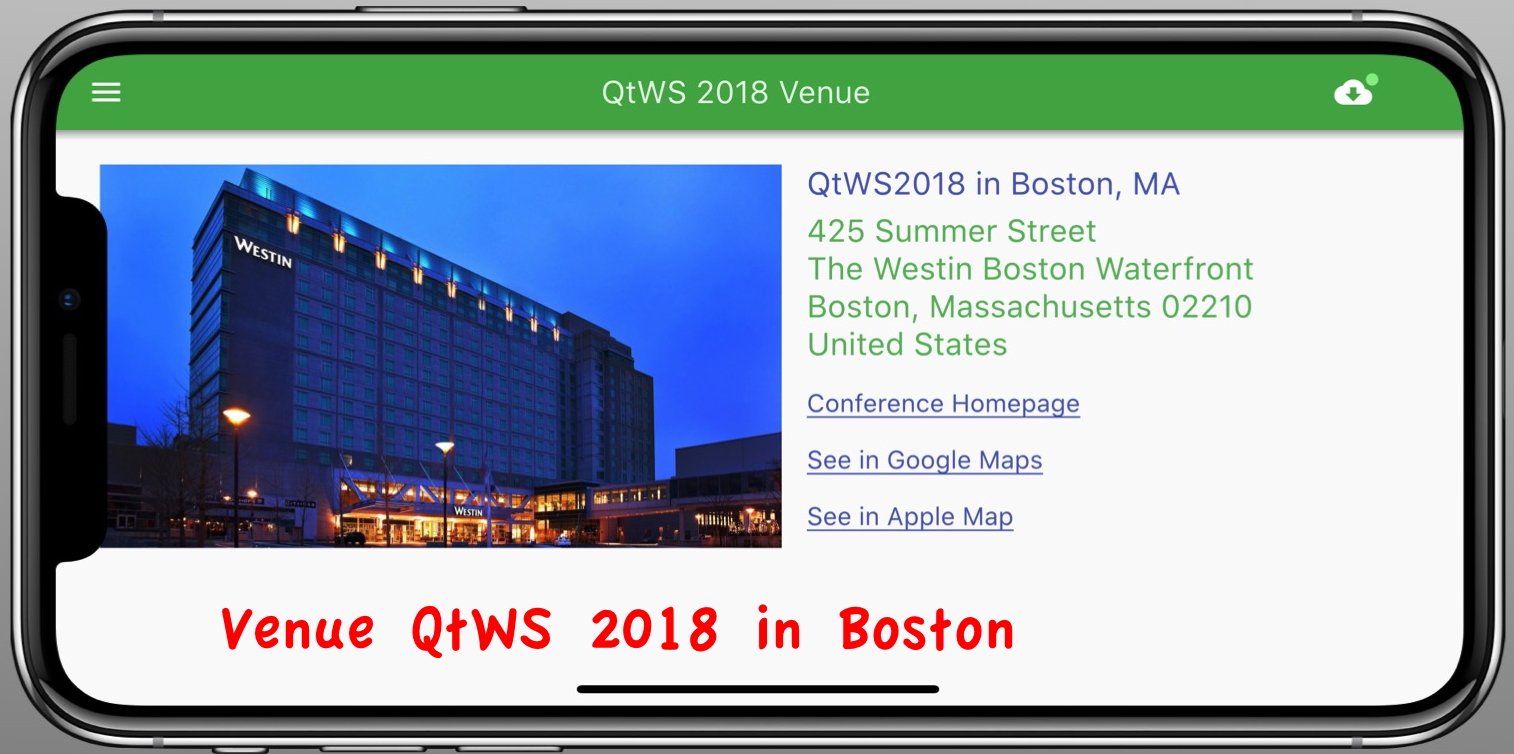
The Venue Page helps you to explore the conference location. Here's Boston:
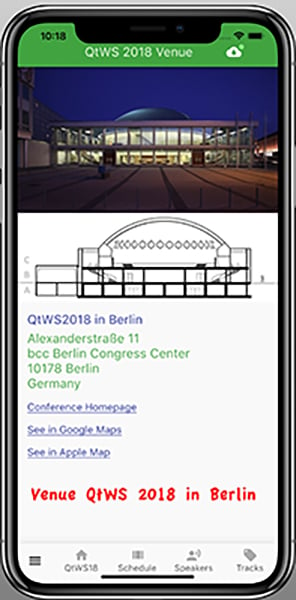
and Berlin:
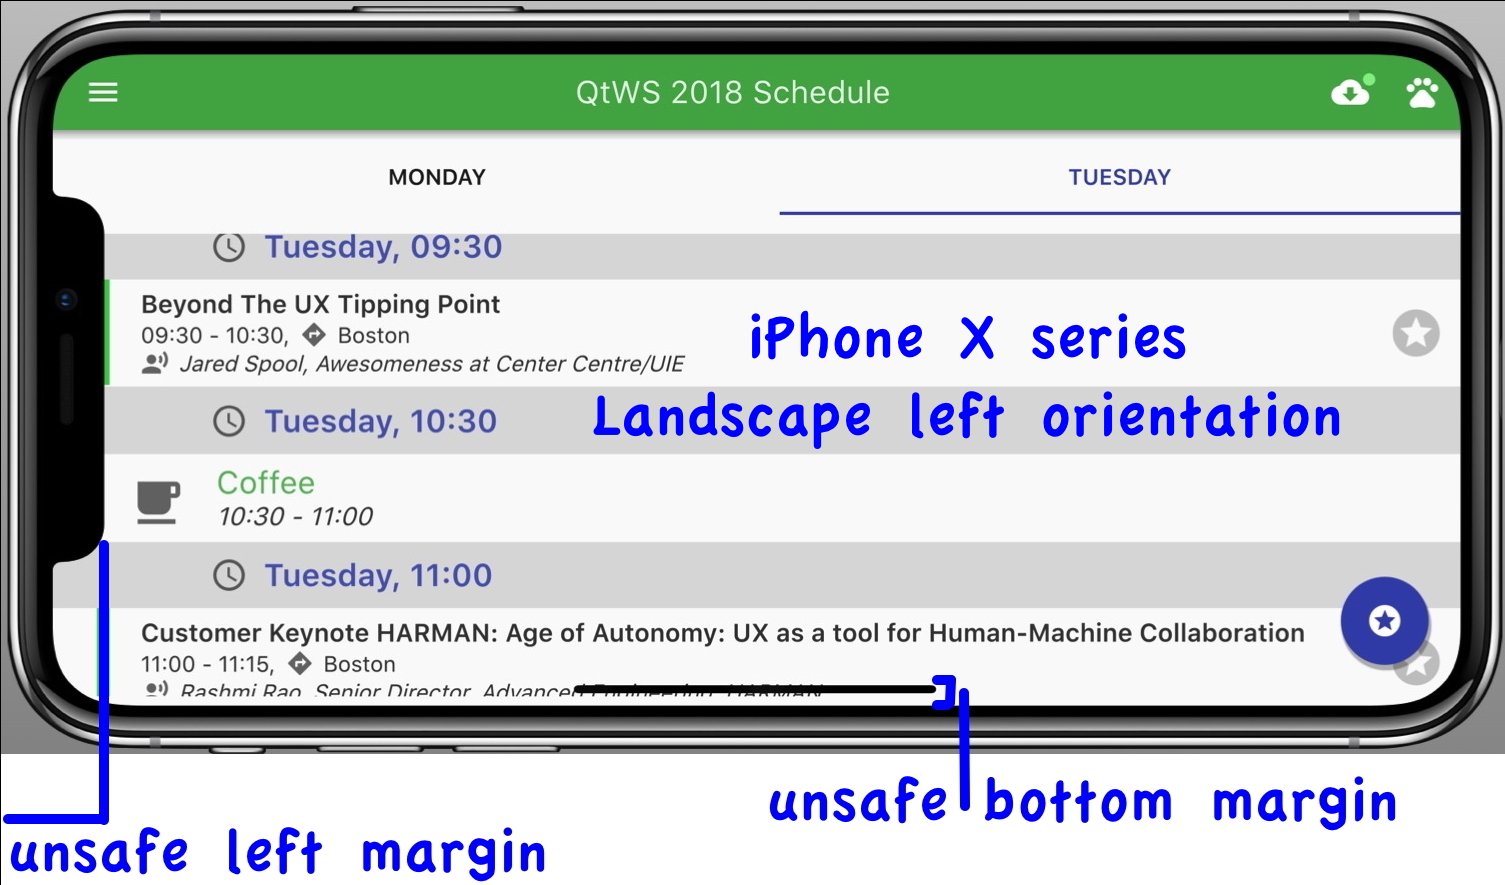
iOS 12 / iPhoneX series support
The screenshots above are all from iPhoneX, but the conference app, of course, runs on Android and iOS.
Apple requires support of iOS 12 and iPhoneX, XS, XS Max, XR with the “notch“, so it's a good idea to prepare your app.
First step: use the full-screen area including the notch and statusbar by setting a flag:
ApplicationWindow {
flags: Qt.MaximizeUsingFullscreenGeometryHint
}
Now your Qt App fills the total screen and you must ensure that no data is displayed in statusbar / notch or rounded corners if the device is an iPhone X. Also on „classic“ iPhones without a notch we now cover the status bar.
Here are some screenshots where you need margins to avoid displaying data in statusbar or where the notch is. This also depends from orientation:
• Portrait
• Landscape Left
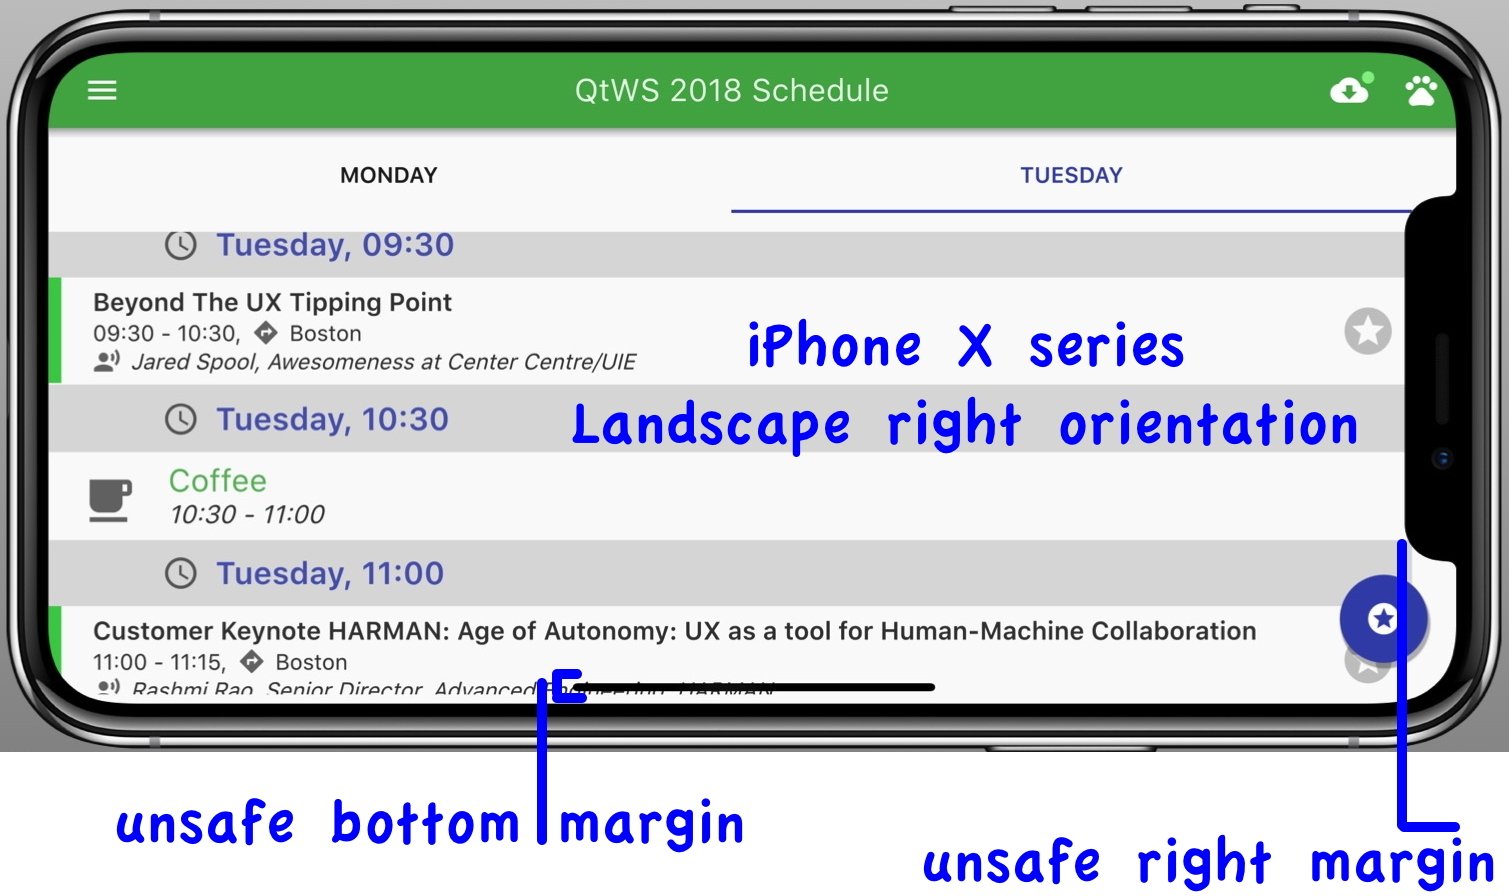
• Landscape Right
You must define the supported orientations in your info.plist:
<key>UISupportedInterfaceOrientations</key>
<array>
<string>UIInterfaceOrientationPortrait</string>
<string>UIInterfaceOrientationPortraitUpsideDown</string>
<string>UIInterfaceOrientationLandscapeLeft</string>
<string>UIInterfaceOrientationLandscapeRight</string>
</array>
Hint: The iPhoneX doesn't support PortraitUpsideDown yet, but you must support this orientation because iPads need it. At first I removed it but my App was rejected by Apple.
iPhoneX Portrait
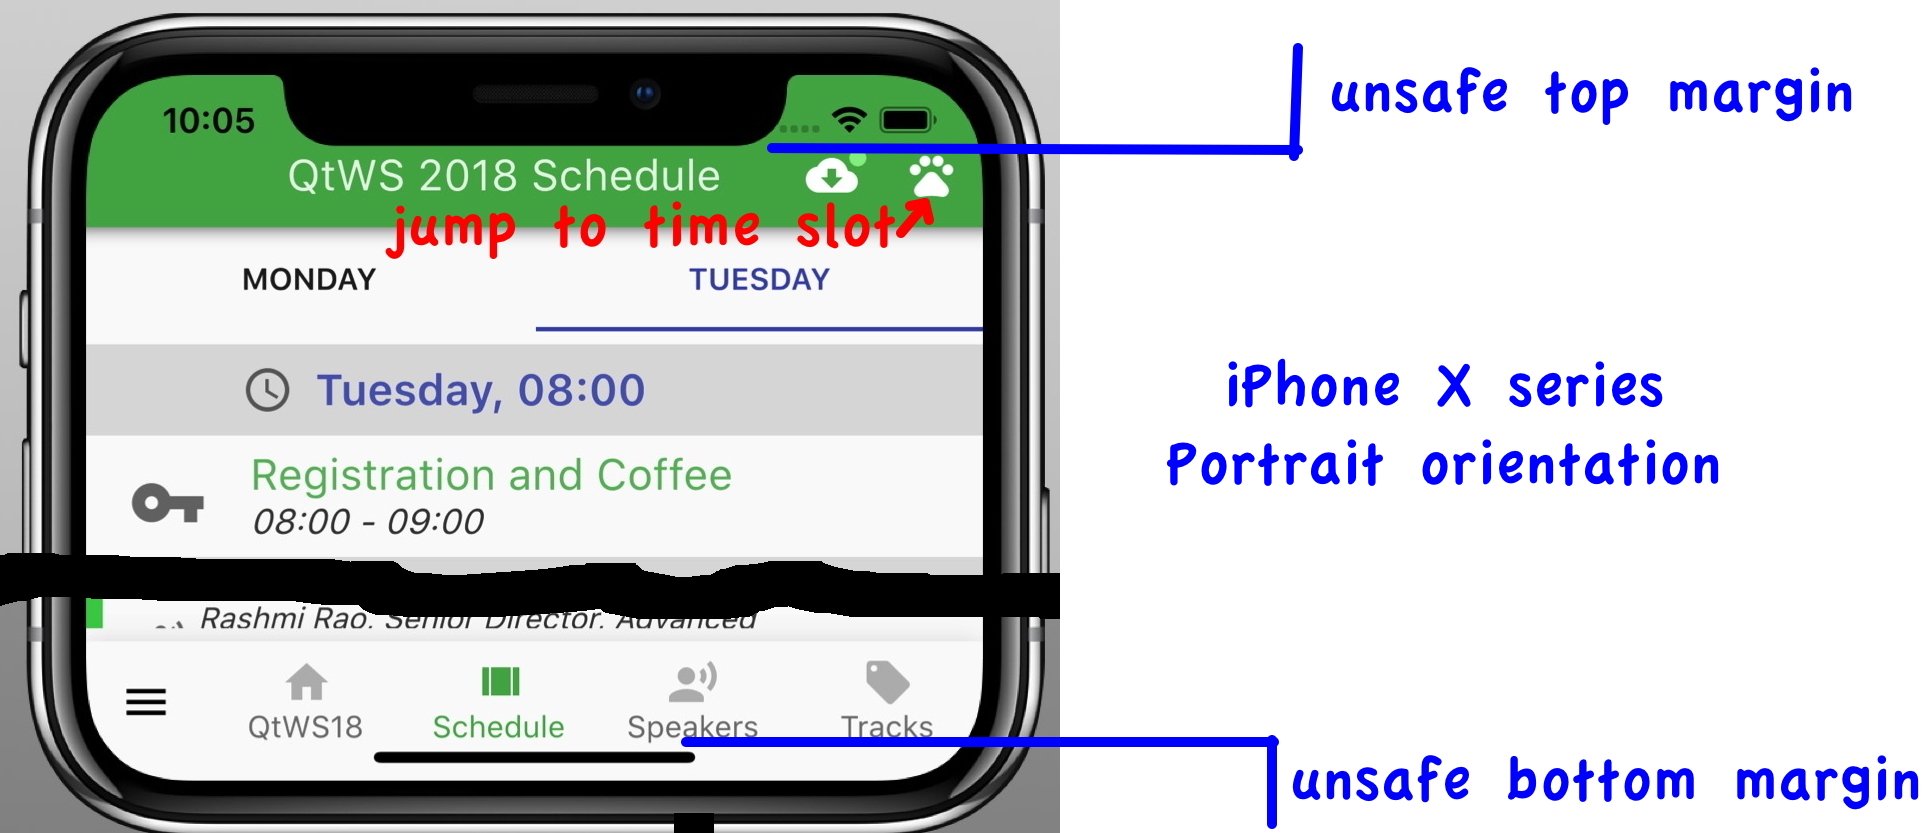
Perhaps you also need to set left and right margins because of the rounded corners.
In my Apps the root Control is a StackView with header and footer. As header and footer I have placed a ToolBar with ToolButtons and they fit into the rounded corners, so I only have to set the top and bottom margins.
iPhoneX Landscape Left
iPhoneX Landscape Right
iPhone8 Portrait
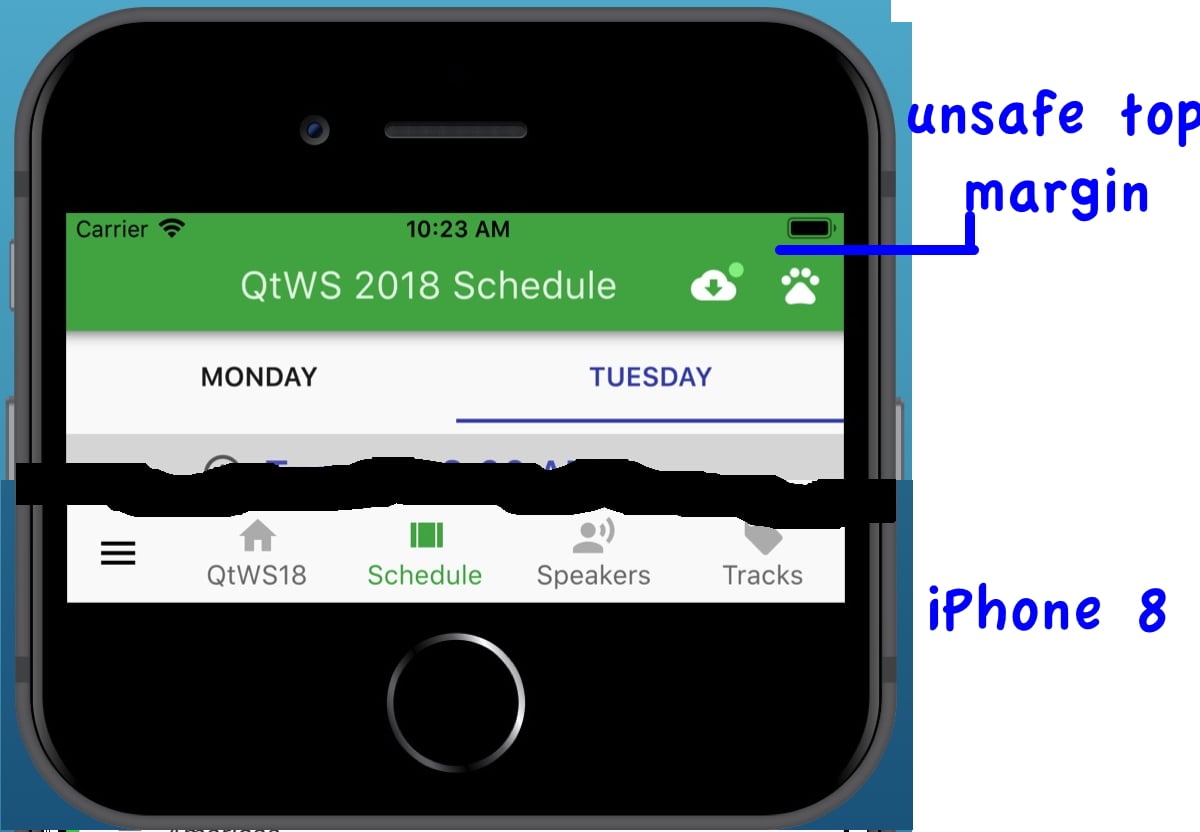
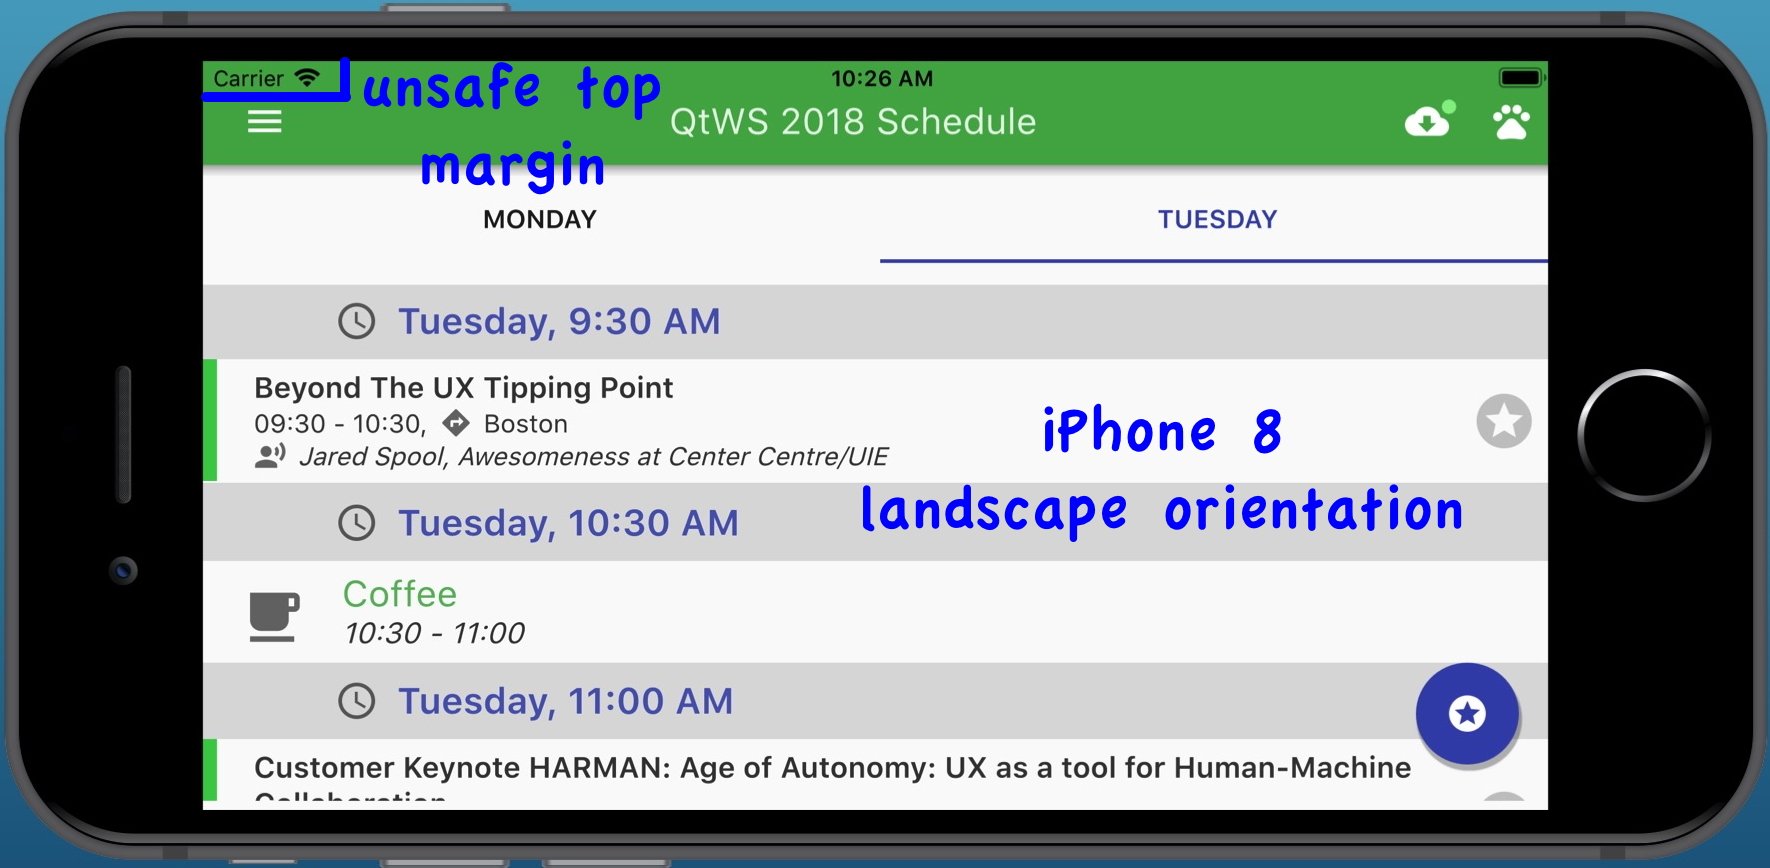
iPhone8 Landscape
HowTo manage the unsafe areas?
The margins depend on your App UI and iPhone Device.
To make it easy for you I created a C++ class UnsafeArea.cpp
In main.qml:
ApplicationWindow {
id: appWindow
// https://bugreports.qt.io/browse/QTBUG-64574
// https://stackoverflow.com/questions/46192280/detect-if-the-device-is-iphone-x
property int lastOrientation: 0
property int myOrientation: (Qt.platform.os === "ios")? Screen.orientation : 0
onMyOrientationChanged: {
if(lastOrientation === 0) {
Screen.orientationUpdateMask = Qt.LandscapeOrientation | Qt.PortraitOrientation
| Qt.InvertedLandscapeOrientation | Qt.InvertedPortraitOrientation
unsafeArea.configureDevice(Screen.height, Screen.width, Screen.devicePixelRatio)
}
// triggers unsafe areas and sets margins
unsafeArea.orientationChanged(myOrientation)
lastOrientation = myOrientation
}
property int safeWidth: width - unsafeArea.unsafeLeftMargin - unsafeArea.unsafeRightMargin
property int safeHeight: height - unsafeArea.unsafeTopMargin - unsafeArea.unsafeBottomMargin
}
Starting the App the Screen.orientation changes the first time and we use this as a trigger to set Screen.orientationUpdateMask and to configure the device.
Different iPhone models are detected by screen pixel size – see the details here.
If orientation changes the margins will be set automatically, per ex:
void UnsafeArea::orientationChanged(int orientation)
{
if(orientation == 1) {
portrait();
} else if(orientation == 2) {
landscapeLeft();
} else if(orientation == 4) {
portraitInverted();
} else if(orientation == 8) {
landscapeRight();
} else {
//...
}
}
void UnsafeArea::portrait()
{
switch (mMyDevice) {
case MyDevice::IPHONE_X_XS:
case MyDevice::IPHONE_XSMAX:
case MyDevice::IPHONE_XR:
setUnsafeTopMargin(24);
setUnsafeBottomMargin(8);
setUnsafeLeftMargin(0);
setUnsafeRightMargin(0);
break;
case MyDevice::IPHONE_5_5S_5C:
case MyDevice::IPHONE_6_6S_7_8:
case MyDevice::IPHONE_6PLUS_6SPLUS_7PLUS_8PLUS:
setUnsafeTopMargin(16);
setUnsafeBottomMargin(0);
setUnsafeLeftMargin(0);
setUnsafeRightMargin(0);
break;
To get the margins from UnsafeArea.cpp:
Q_PROPERTY(int unsafeTopMargin READ unsafeTopMargin ...
Q_PROPERTY(int unsafeBottomMargin READ unsafeBottomMargin ...
Q_PROPERTY(int unsafeLeftMargin READ unsafeLeftMargin ...
Q_PROPERTY(int unsafeRightMargin READ unsafeRightMargin …
Now in QML, you can use these margins to adjust your UI. In my App the root StackView has a header and footer, so I had to adjust them. Per ex the header:
ToolBar {
id: myTitleBar
topPadding: unsafeArea.unsafeTopMargin? unsafeArea.unsafeTopMargin : undefined
In my Pages I had to watch that left and right margins will be set correct:
Page {
....
StackView {
id: navPane
anchors.fill: parent
anchors.leftMargin: unsafeArea.unsafeLeftMargin
anchors.rightMargin: unsafeArea.unsafeRightMargin
There are some use cases where I'm calculating sizes or positions depending on the width and height of ApplicationWindow. Now I have to subtract the top, bottom, left and right margins from unsafe areas.
ApplicationWindow {
...
property int safeWidth: width - unsafeArea.unsafeLeftMargin - unsafeArea.unsafeRightMargin
property int safeHeight: height - unsafeArea.unsafeTopMargin - unsafeArea.unsafeBottomMargin
What about Android Devices with notch?
Since Android Pie there are also some devices with a notch. I'll add support for Android later.
QtQuickControls2
The QtWS2018 Conference App is an update of my old 2016 Conference App. In the meantime, many Controls are new or got new functionality. I haven't found the time to update all of this, but hopefully before QtWS2018 Berlin starts. Remember: I'm doing all of this in my rare spare time.
See you
If you want to discuss the App or mobile business app development with QtQuickControls2 you can meet me in Boston or Berlin – I'll attend both conferences.
If you haven't already done: take a look at my blog series Qt for Mobile Business Apps.