In-app purchase is an increasingly popular form of application monetization, especially in saturated markets such as the mobile apps markets, since it enables users to download applications for free and try them out before they pay. When the only thing you have to lose is time, the threshold for installing an unknown application is likely a lot lower than if you had to pay up front.
But you already know this, because you have been asking us regularly how to do it in Qt for the past few months. Our short answer is that Qt does not have a cross-platform API for this, at least not yet, so you will have to add some platform-specific code to your application.
This blog post is the long answer. Using a simple game as an example, I'll go through each of the steps to enable in-app purchases in an Android application. The application source is also available, so you can take a look at it before doing your own implementation.
So what is it?
For those of you who have not been asking us about this, and therefore cannot be proven to know what in-app purchases are, I'll give a very quick overview.
In brief, in-app purchase is this: Instead of paying to download and run an application, there are instead features of the application that are available for purchase when you are already running it. Some examples of the types of purchases the application can provide are:
- Subscription to content, like in an online magazine with monthly content updates.
- Consumable items, e.g. a magic potion in a game, of which you can buy an unlimited amount.
- Or a permanent purchase to unlock vital features of the application. For instance, the Save function in a photo editing application might be disabled until you've paid an in-app fee, so that users can test the application before they decide if it's worth the price.
The way this all works in Google Play is that you add one or more "In-app Products" to the store listing for your application. You give each item a product ID (SKU), and add code in your application to launch the purchase process. The process itself is out of your hands. The user will be asked to confirm the purchase, and your application will be informed about the status of the transaction asynchronously. I will not go into the details of the APIs in this blog, so if you're planning to implement something like this, make sure you read the Android documentation on the subject first.
The example
As my example, I've written a simple Hangman game in QML. Consonants are free (except for the traditional non-monetary penalty of wrong guesses), but you have to pay a minimal fee for vowels. The application is available for download, so you can quickly run it and see it in action, but rather than buy any vowels in the downloaded game, you can compile it yourself from source, upload it as a draft to your personal Google Play Developer Console and run it unpublished. As long as your personal version of the application remains unpublished, you can test the full purchase process without actually being charged. Just make sure you add your test account in the Settings page of your Developer Console.
I should note that if this were a proper game, I would probably have users pay for packs of, say, 50 vowels or so, both to avoid overpricing and to avoid going through the steps for purchasing every time they want to guess for a vowel. But for this example, it would only make the code more complex, so I've left it as simple as possible.
The game
First, a quick run-through of how the game works: I started by developing everything in the game on my desktop machine, leaving out the platform-specific purchase code for now. This approach has several benefits over writing directly for device:
- It makes iterative testing faster, as the application does not need to be deployed before it can be run.
- It makes it easy to test that the application adapts to different screen sizes, as I can easily resize my main window and see it adapt in real time.
- And it forces me to write the application in a cross-platform way, so that it can be ported to other platforms later with relatively little effort.
Regardless of what type of application I'm writing, I'll usually try to take this approach, and if the application depends on inputs or features that are only available on the target platform, I'll make an effort to simulate them in the desktop build.
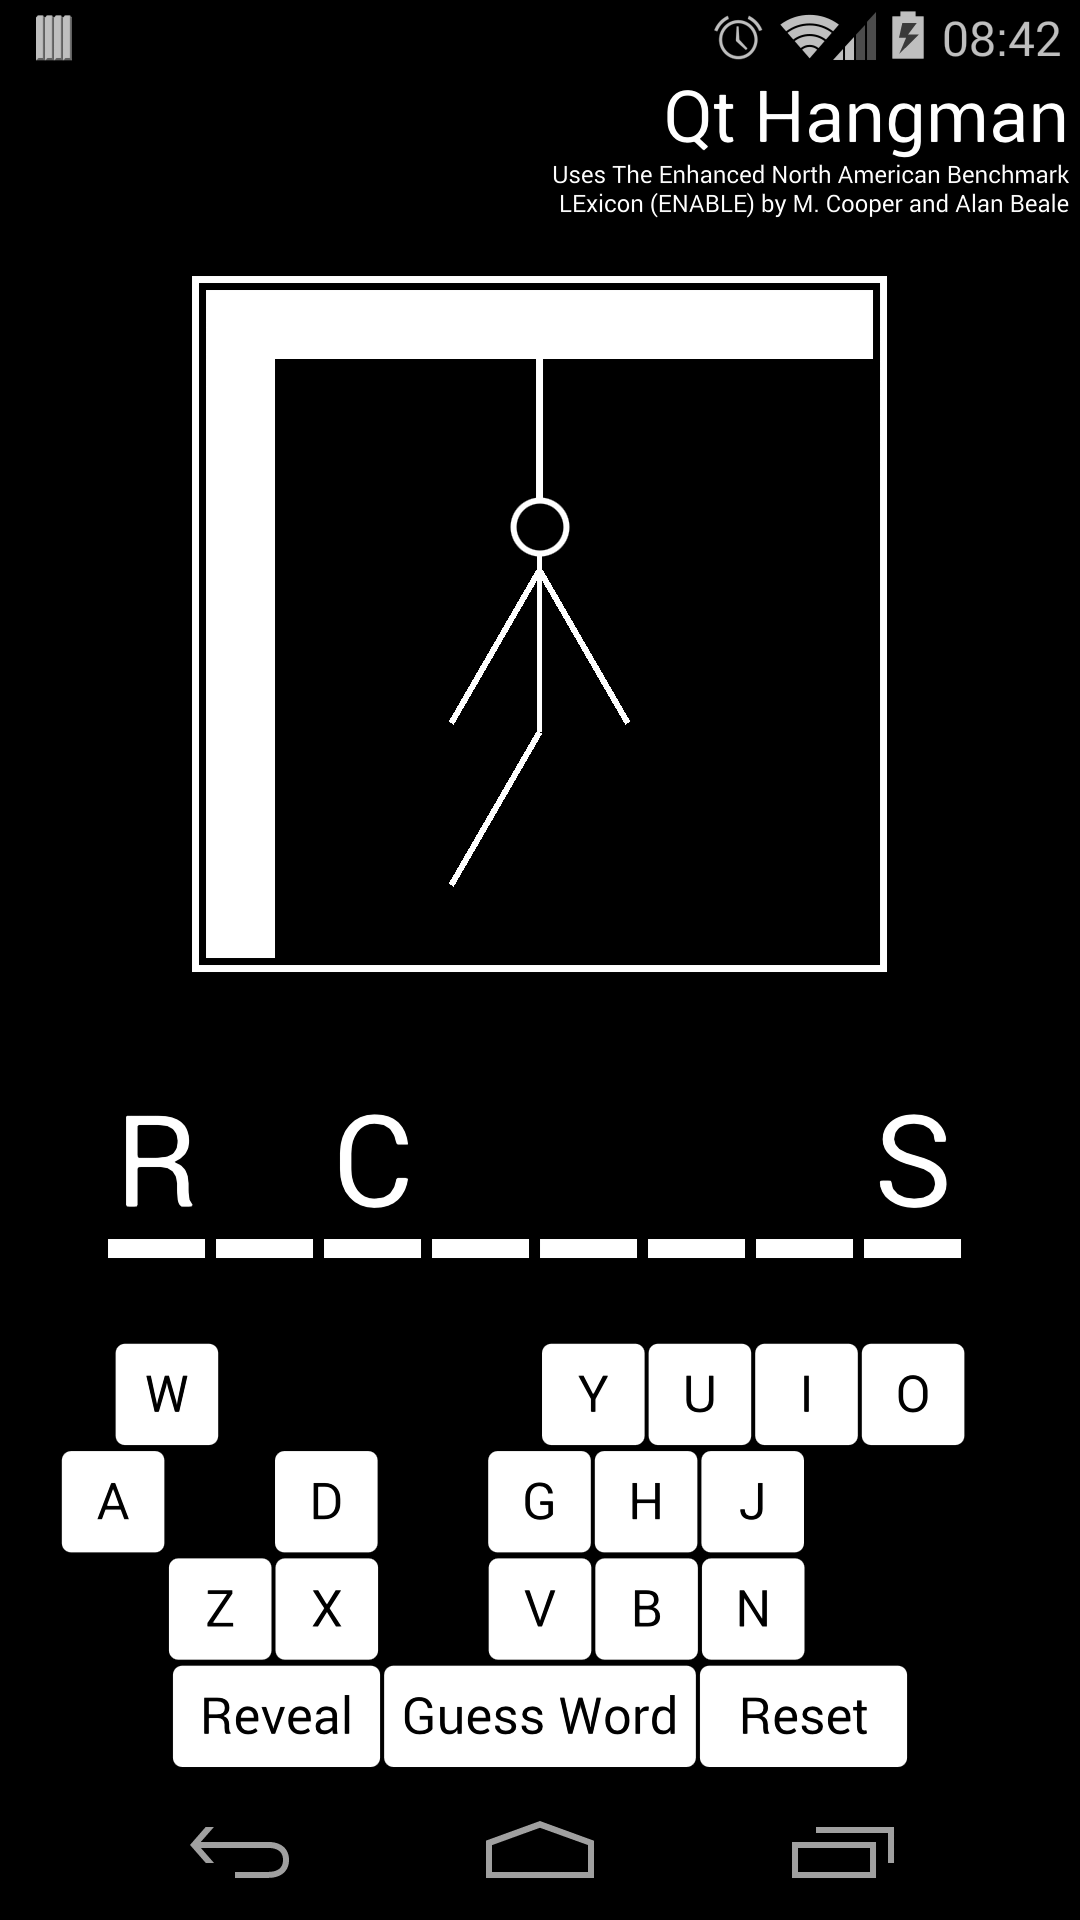 Click the letters to guess
The game itself is just a scene in QML, hooked up to a Data object written in C++. The Data object is used to manage the current solution word and the guesses. You play the game by selecting letters at the bottom. If you select a vowel, you will be asked to pay before it is tested against the solution. You can also wager a guess for the full solution if you think you've got it. That part is free ;)
The word list is based on the public domain ENABLE dictionary by Alan Beale and M. Cooper. This initially contained a lot of words we had never heard before, but Paul Olav Tvete limited it to words used in the Qt documentation or on the Qt Development mailing list, so the game should be familiar to avid Qt users :)
As you make guesses, they will either be displayed as part of the solution if they are contained in the word, or one line of the hangman picture will be added to the square in the middle of the screen. When the entire drawing is finished, the game will be over. If you manage to guess the solution before this happens, you win the game.
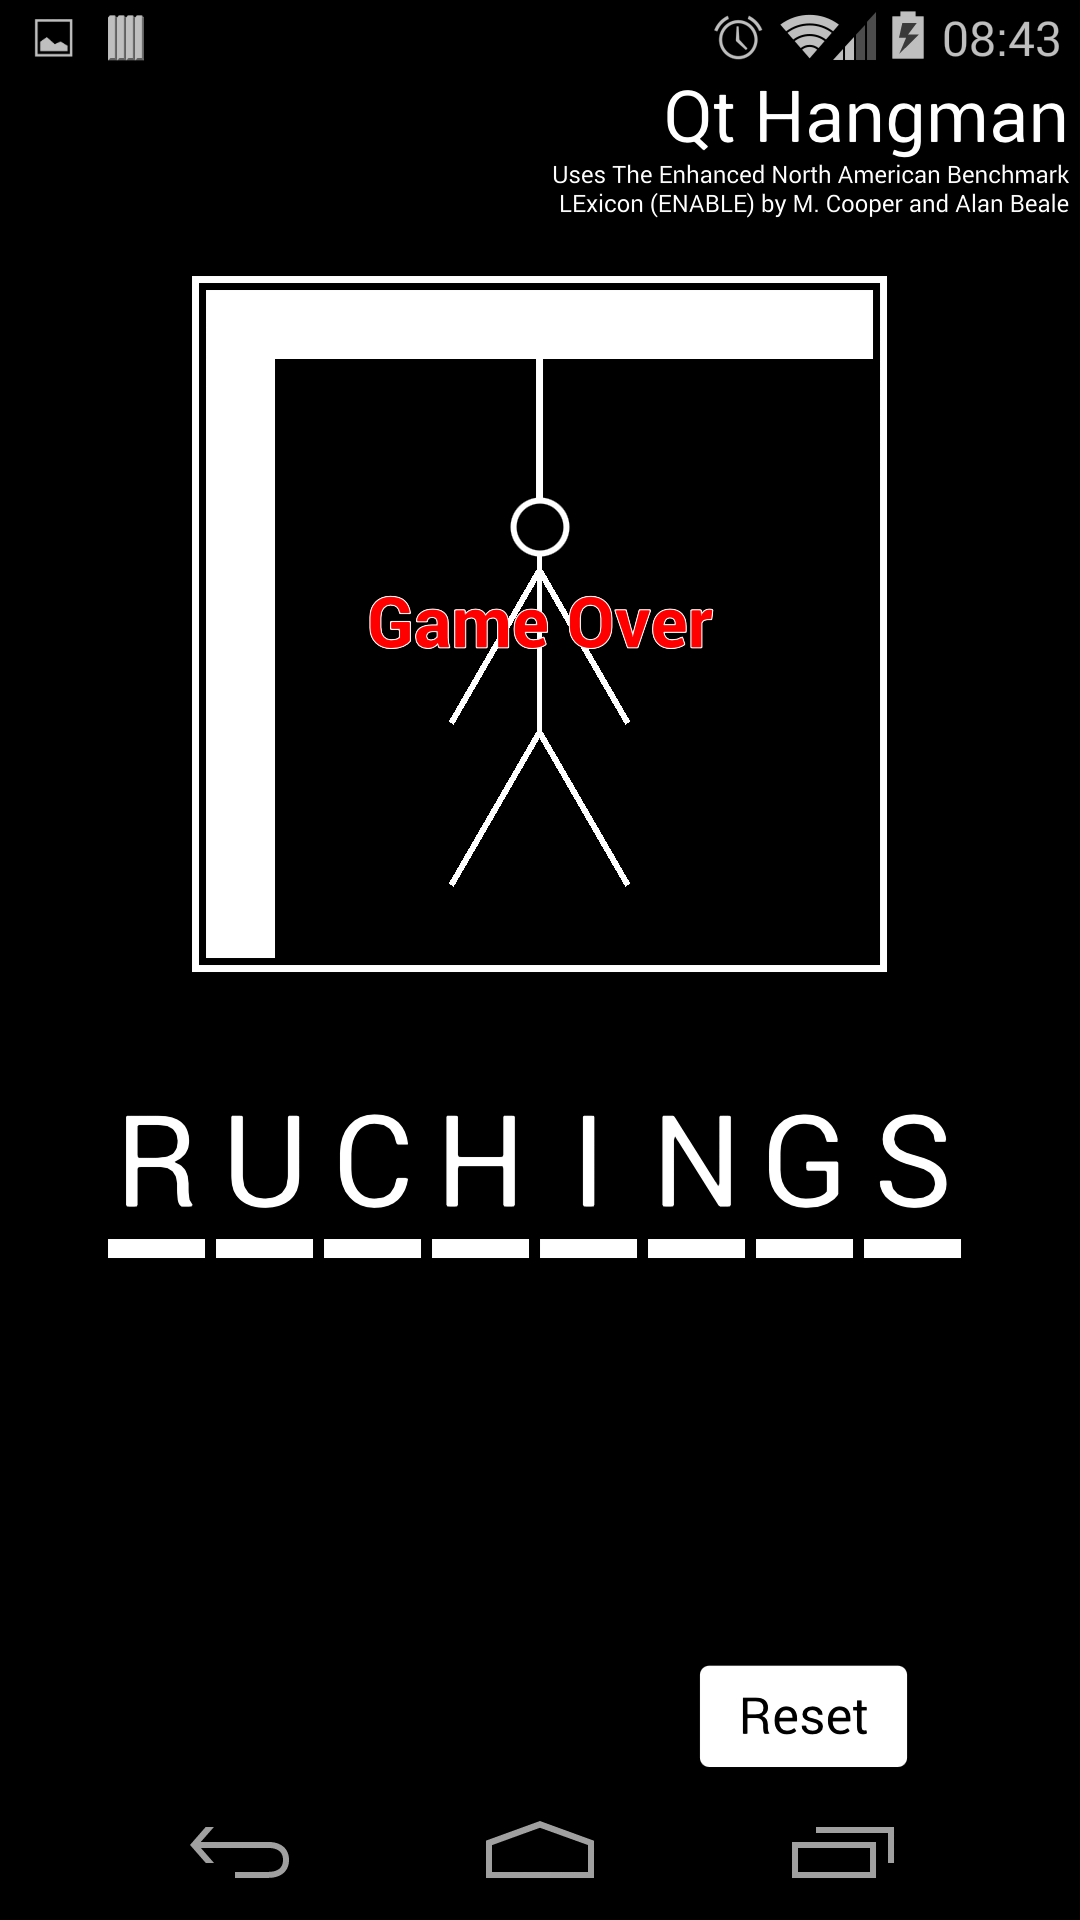 If you make too many wrong guesses, it's game over.
You can click on the Reset button in the top left corner to get a new puzzle, picked randomly from the ENABLE dictionary, or you can hit the Reveal button to give up and show the solution.
I won't go into any more detail about the game itself. The interesting part here is the in-app purchasing, so I'll spend the rest of the blog post on that.
On iOS
Before I continue with the technical details, I'll briefly mention iOS as well: As I said, while the the example code is not 100% cross-platform, it is structured to be easily adaptable to other platforms, attempting to minimize the amount of extra code you have to write to port it. And in fact, Andy Nichols already wrote some code to move the game to iOS which is nearly done, but not quite ready for release just yet. He will blog about this later on, but the code we have so far is already in the source repository for you to look at.
In-app purchase: Structure
So, I wanted to finish the desktop version of the game before implementing the Android-specific part. As an abstraction of the platform-specific code I would have to add in later, I identified the need for the following function to take care of actually purchasing a vowel from the market place:
void buyVowel(const QChar &vowel);Since the Android in-app purchase APIs are asynchronous, I also added a signal which is emitted when the purchase succeeds:
signals:
    void vowelBought(const QChar &vowel);
When this signal is emitted, it means the transaction has been made, and I add the selected vowel to the list of current guesses. In order to run the application on desktop (and other platforms as well), I add a file named data_default.cpp with the following default implementation of the buyVowel() function:
void Data::buyVowel(const QChar &vowel)
{
    emit vowelBought(vowel);
}
This code will never be compiled on Android, but for other platforms, it will imitate a successful purchase. To avoid compiling the code on Android, I add the following to my .pro file:
android: SOURCES += data_android.cpp
else: SOURCES += data_default.cpp
Now it's quite easy for me to add an Android-specific implementation of buyVowel() in data_android.cpp, and also to add implementations for other platforms down the road.
The Java code
Since the Android APIs are based in Java, I made the main bulk of my implementation in Java and then later accessed this through JNI from my C++ application. I won't go into detail about the actual usage of the Android APIs, since that's already thoroughly documented in the official documentation. I will however highlight a few areas of particular interest in the Java code for my game.
First of all, I needed to add the Android-specific files to my project. I started by adding an AndroidManifest.xml file to my project using Qt Creator.
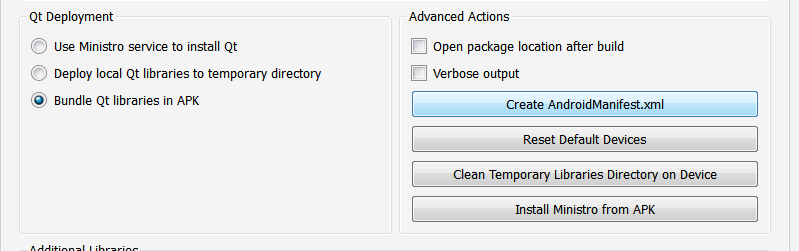 Qt Creator gives you the option to quickly add a default manifest to your app.
I chose to put the manifest in the subdirectory android-source. After adding this directory, all my Android-specific files can go into it. In general, it should contain the files you want to add to the Android project and the directory structure should follow the regular Android project directory structure. The contents of the directory will later be merged with a template from Qt, so you should only put your additions and modifications here. There is no need to include an entire Android project.
Next, I added a new Activity subclass. Java sources need to go in the src directory to be recognized correctly when building the package, and in a subpath which matches the package namespace of the class. In my case I placed the class in android-source/src/org/qtproject/example/hangman/.
To make sure Qt is loaded correctly, I had to subclass Qt's default Activity class. This is very important.
import org.qtproject.qt5.android.bindings.QtActivity;
public class HangmanActivity extends QtActivity
I also had to make sure to call into the super class from all reimplementations of methods. Like here:
@Override
public void onCreate(Bundle savedInstanceState)
{
    super.onCreate(savedInstanceState);
    bindService(new Intent("com.android.vending.billing.InAppBillingService.BIND"),
                m_serviceConnection, Context.BIND_AUTO_CREATE);
}
In my game, the Activity is a singleton, so I store a static reference to the object in the constructor:
private static HangmanActivity m_instance;
public HangmanActivity()
{
    m_instance = this;
}
(My C++ Data class has the same logic. I'm doing this so that I can facilitate the communication between the Java and the C++ code using static methods. For a more complex example, it's also possible to store references and pointers in each C++ and Java object that maps it to its equivalent in the other language, but that is not necessary in this game.)
In my Activity class in Java, I implemented a method to handle the request for purchasing a vowel:
public static void buyVowel(char vowel)And I also added a native callback method which I can call when I've received the asynchronous message that the vowel has been purchased:
private static native void vowelBought(char vowel);The native keyword indicates that the method is implemented in native code. I'll come back to the implementation of that later.
My buyVowel() method follows the documentation closely. The main part to note is the following snippet:
Bundle buyIntentBundle = m_instance.m_service.getBuyIntent(3,
                                                           m_instance.getPackageName(),
                                                           "vowel",
                                                           "inapp",
                                                           "" + vowel);
This code will create a Buy Intent for API version 3, the package name of my application (note that this is the application package in the Google Play store and AndroidManifest.xml, not the package namespace of the Java class), and the in-app product identified as "vowel". In addition, I'm passing "inapp" as the type and I'm passing the actual vowel requested as the developer payload. The latter will be returned back to me along with the message of a successful purchase, so that I can easily inform my application of which letter was actually purchased.
The message informing my application whether the purchase was successful or not is delivered in the method onActivityResult(). In this method I can retrieve several pieces of information about the purchase in JSON format:
JSONObject jo = new JSONObject(purchaseData);
String sku = jo.getString("productId");
int purchaseState = jo.getInt("purchaseState");
String vowel = jo.getString("developerPayload");
String purchaseToken = jo.getString("purchaseToken");
I quickly verify that it's the correct product and that it was successfully purchased (purchaseState == 0). If this is the case, I inform my native code of the purchase, and I immediately consume it:
if (sku.equals("vowel") && purchaseState == 0) {
    vowelBought(vowel.charAt(0));
    // Make sure we can buy a vowel again
    m_service.consumePurchase(3, getPackageName(), purchaseToken);
    return;
}
Consuming the purchase is very important in this case, as you will not be able to purchase the same product again later unless it has been consumed. So for consumable items, like these vowels, which you should be able to purchase an unlimited number of times, we must consume them immediately after they have been registered in the application. For permanent purchases (imagine if I also had a slightly more expensive product called "Free vowels forever"), you would skip this step. You could then later query Google Play for the product and it would tell you that it has already been purchased.
Finally, in order to be able to access the billing API, I need to add its interface to my project, as explained in the Android documentation. I copy the file IInAppBillingService.aidl into subdirectory android-source/src/com/android/vending/billing.
AndroidManifest.xml
A few modifications are necessary to the default AndroidManifest.xml file. This is the file which describes your application to the device that is running it, and also to the Google Play store which needs the information to properly advertise it to the correct devices.
Like for all Android applications, I need to set an icon, a name, a package name, etc. In the source tree, I've left the package name empty. This is intentional, as you will need a unique package name for your instance of the application in order to register it in Google Play. Make sure you set this before building. I've also locked the screen orientation to "portrait", because that's how the application was designed.
Specifically for using the in-app purchase API, I need to declare that I am using the "BILLING" permission:
<uses-permission android:name="com.android.vending.BILLING"/>If I neglect to add this, then my application will get an exception when trying to access the APIs.
In addition, I need to set my own Activity class as the main activity rather than Qt's class:
<activity ... android:name="org.qtproject.example.hangman.HangmanActivity">This ensures that the HangmanActivity class will be instantiated when the device launches the application.
The native code
All the Android-specific native code is in the data_android.cpp file. As mentioned, it needs a platform-specific implementation of the buyVowel() function:
void Data::buyVowel(const QChar &vowel)
{
    QAndroidJniObject::callStaticMethod("org/qtproject/example/hangman/HangmanActivity",
                                              "buyVowel",
                                              "(C)V",
                                              jchar(vowel.unicode()));
}
The only thing this code does is issue a call to the Java method described in the previous section. Thus, it will launch an asynchronous request for the vowel and we will wait until the payment goes through before doing anything else.
In addition, we need to implement the native vowelBought() method, which will be called from Java when the purchase is successful:
static void vowelBought(JNIEnv *, jclass /*clazz*/, jchar c)
{
    Data::instance()->vowelBought(QChar(c));
}
This is just a regular C++ function, with the exception that it will always get a JNIEnv pointer as its first argument, and a jclass argument which is a reference to the declaring class in Java (since this is a static method.) As you can see, it simply accesses the Data singleton and emits the vowelBought signal to register the purchased vowel.
Finally, the native method is registered using a standard boiler plate when the library is loaded. Check the code to see the full thing.
Putting it in the store
Then we've reached the final step, which was to actually upload the APK to the Google Play market and add the products for purchase there. Note that you do not have to publish the application in order to test the in-app purchases: You can keep the APK in Draft mode and mark the products as "To be activated", in which case you have to handle the distribution of the application yourself, but the Google accounts listed in the "LICENSE TESTING" section of your Developer Console Settings will be able to make test purchases once they have installed it. You can also publish a Beta version of your application in the store, in which case you can manage who will be able to download it and make test purchases using Google Groups.
I started by registering a listing for my application. Once this was done, and I'd filled out the necessary pieces of information, I had to upload the APK. You cannot register any products in the listing before you've uploaded an APK. (Make sure you sign the package with your private key before uploading it. The whole process of generating a key and signing the package can be done from inside Qt Creator, in the Project -> Run -> Deploy configurations.)
Once this has been done, I can add a product. I click on the "In-app products" tab, and select to create a new product. Then I fill out the necessary information:
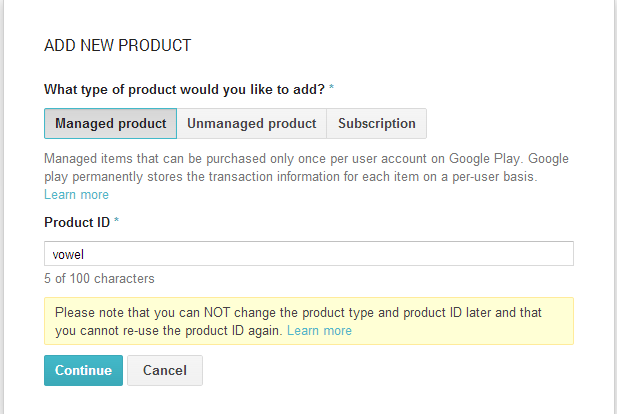 Google Play registration of my "vowel" product
I had to make sure I picked "Managed product" here, as this is the only type supported by API version 3. It means that Google Play will remember that the product was purchased for you, and you will need to explicitly consume it before you can purchase the same product again.
When the product has been added, I can add some more details:
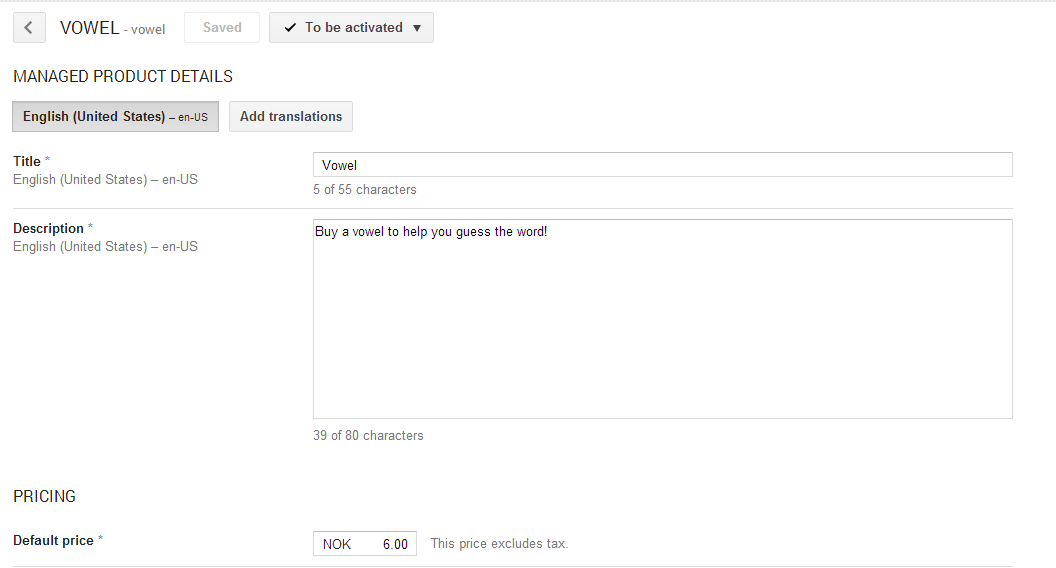 You can add descriptions and pricing information to your products in the developer console.
I've added a short description of the item, and set the price to the minimum possible price (6 NOK which is approximately 1 USD). I also make sure to mark the product "To be activated" so that it can be purchased. When the application is published, the product will become activated automatically.
Done
And that's it. I can now run the application on my devices and purchase vowels as much as I want. Until the application is published into "Production", no transactions will actually be carried through, so you can test your local build without fearing that you'll run out of money.
But do note that if you decide to use Digia's version of the application, then purchases are real, since Google Play has a set minimum price.
Good luck!
Discover more Qt news: Introducing Qt Mobile