I loved video games as a kid. Pokémon Blue and Wario Land on GameBoy. On the SNES I played SimCity, The Lost Vikings, Cannon Fodder, Super Mario World, Axelay... probably more that I can't remember. Then there were the old Windows 95 games on PC, PlayStation, Xbox... ah, good times. Video games were the reason I started learning how to program: I wanted to make my own games. To this day (at least a decade later) I'm still working on games in my spare time, hoping to one day release a game that others will enjoy as much as I enjoy the games I play.
The current one I'm working on is a 2D isometric turn-based RPG. The artwork is all pixel art, as it's easy to create, and, as a bonus, I don't have to worry about scaling/high DPI! While working on the game, I decided that I should find a tool for creating tilesets. None of the tools I looked at had what I was after, so I thought: "how hard could it be to create my own?"
As it turns out, it wasn't that hard, and it was also really fun and rewarding. It has also branched out beyond just creating tilesets, and is now a more general editor that has support for editing images directly and using layers. Here's a GIF of it in action (apologies in advance for the compression in the colour picker):
It's still in alpha, but it's at a stage where I've been happily using it to create the artwork for my game, so I consider it usable.
Taken from its GitHub page:
"Slate was built for pixel art, and its goal is to simplify the creation of sprites and tilesets by offering a user-friendly, customisable interface."
Being a desktop application built with Qt Quick Controls 2, I figured that it might be an interesting example for others to read about. In this post, I'm going to briefly discuss how I implemented Slate's user interface and auto tests.
Visual Structure
Slate is simple. My goal when creating it was to have something that was fun to work on and easy to maintain.
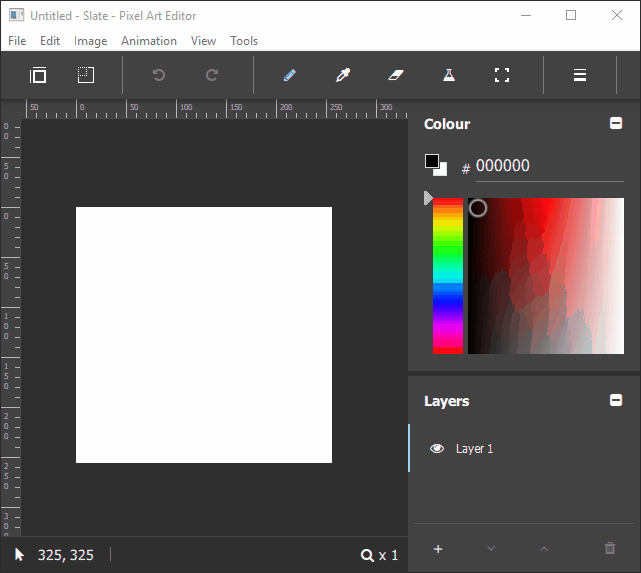
To that end, each instance of Slate can only have one image open at a time. The canvas for the image takes up the most of the screen:
Panels
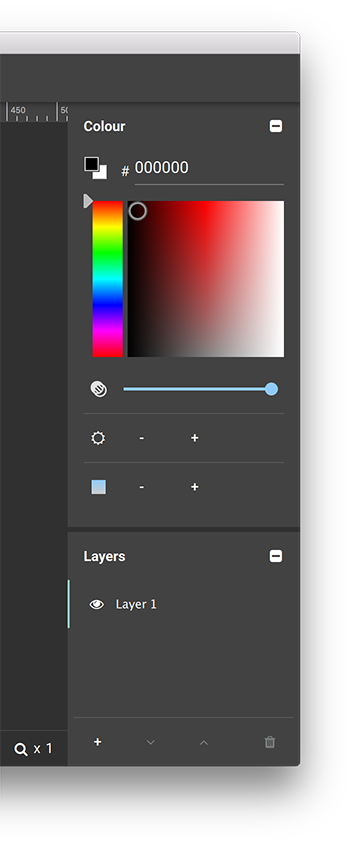
Currently, all of the panels are collapsible, but fixed to the right side of the window. I know some people like dockable windows, but in the spirit of keeping it simple, I went with this approach. Each panel is represented by Panel.qml:
import QtQuick 2.6
import QtQuick.Layouts 1.1
import QtQuick.Controls 2.0
import App 1.0
import "." as Ui
Page {
    id: root
    objectName: "panel"
    background: Rectangle {
        color: Ui.CanvasColours.panelColour
    }
    property bool expanded: true
    property Popup settingsPopup: null
    header: RowLayout {
        spacing: 0
        Label {
            text: root.title
            font.bold: true
            Layout.leftMargin: 16
        }
        Item {
            Layout.fillWidth: true
        }
        ToolButton {
            objectName: root.objectName + "SettingsToolButton"
            text: "\uf013"
            font.family: "FontAwesome"
            focusPolicy: Qt.NoFocus
            visible: settingsPopup
            Layout.preferredWidth: implicitHeight
            onClicked: settingsPopup.open()
        }
        ToolButton {
            objectName: root.objectName + "HideShowToolButton"
            text: expanded ? "\uf146" : "\uf0fe"
            font.family: "FontAwesome"
            focusPolicy: Qt.NoFocus
            Layout.leftMargin: -8
            Layout.preferredWidth: implicitHeight
            onClicked: expanded = !expanded
        }
    }
}
Panel itself is a Page. I chose this type because it allows me to conveniently specify a header that contains the title of the panel and its buttons. Each panel can be collapsed, and can also provide some panel-specific settings that are modified through a popup.
Menus
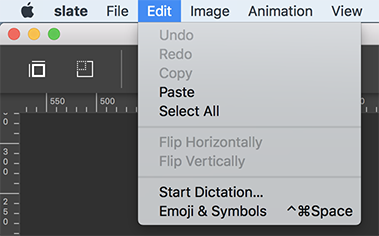
Common tools and operations are in the toolbar at the top of the window, with the complete set being available in the menu bar:
import Qt.labs.platform 1.0 as Platform
import App 1.0
Platform.MenuBar {
    property ImageCanvas canvas
    property ProjectManager projectManager
    property Project project: projectManager.project
    property int projectType: project ? project.type : 0
    readonly property bool isImageProjectType: projectType === Project.ImageType || projectType === Project.LayeredImageType
    property var canvasSizePopup
    property var imageSizePopup
    // ...
    Platform.Menu {
        id: editMenu
        objectName: "editMenu"
        title: qsTr("Edit")
        Platform.MenuItem {
            objectName: "undoMenuButton"
            text: qsTr("Undo")
            onTriggered: project.undoStack.undo()
            enabled: project && project.undoStack.canUndo
        }
        Platform.MenuItem {
            objectName: "redoMenuButton"
            text: qsTr("Redo")
            onTriggered: project.undoStack.redo()
            enabled: project && project.undoStack.canRedo
        }
        Platform.MenuSeparator {}
        Platform.MenuItem {
            objectName: "copyMenuButton"
            text: qsTr("Copy")
            onTriggered: canvas.copySelection()
            enabled: isImageProjectType && canvas && canvas.hasSelection
        }
        Platform.MenuItem {
            objectName: "pasteMenuButton"
            text: qsTr("Paste")
            onTriggered: canvas.paste()
            enabled: isImageProjectType && canvas
        }
        // ...
    }
    // ...
}
As Slate has been developed against the latest Qt Quick Controls 2 versions, it recently started using native menu bars on all platforms. However, it was previously using non-native menus on Windows until the support was added. I mention this because I feel like it could be a useful example; not only for how to have native controls on some platforms, and non-native controls on others, but also to demonstrate how to use file selectors for situations like this in general. To learn more, see the repo as of this commit; specifically, this version of MenuBar.qml is native, and this one is a non-native alternative for Windows.
ToolBars

The ToolBar is based on the ToolBar control:
import QtQuick 2.6
import QtQuick.Controls 2.1
import App 1.0
import "." as Ui
ToolBar {
    id: root
    objectName: "iconToolBar"
    // ...
    Row {
        id: toolbarRow
        enabled: canvas
        anchors.fill: parent
        // Make sure that we don't end up on a sub-pixel position.
        anchors.leftMargin: Math.round(toolSeparator.implicitWidth / 2)
        ToolButton {
            id: canvasSizeButton
            objectName: "canvasSizeButton"
            enabled: project && project.loaded
            hoverEnabled: true
            focusPolicy: Qt.NoFocus
            icon.source: "qrc:/images/change-canvas-size.png"
            ToolTip.text: qsTr("Change the size of the canvas")
            ToolTip.visible: hovered && !canvasSizePopup.visible
            onClicked: canvasSizePopup.open()
        }
        ToolButton {
            id: imageSizeButton
            objectName: "imageSizeButton"
            enabled: project && project.loaded && !isTilesetProject
            hoverEnabled: true
            focusPolicy: Qt.NoFocus
            icon.source: "qrc:/images/change-image-size.png"
            ToolTip.text: qsTr("Change the size of the image")
            ToolTip.visible: hovered && !imageSizePopup.visible
            onClicked: imageSizePopup.open()
        }
        ToolSeparator {}
        Row {
            spacing: 5
            Ui.IconToolButton {
                objectName: "undoButton"
                text: "\uf0e2"
                enabled: project && project.undoStack.canUndo
                hoverEnabled: true
                ToolTip.text: qsTr("Undo the last canvas operation")
                ToolTip.visible: hovered
                onClicked: project.undoStack.undo()
            }
            Ui.IconToolButton {
                objectName: "redoButton"
                text: "\uf01e"
                enabled: project && project.undoStack.canRedo
                hoverEnabled: true
                ToolTip.text: qsTr("Redo the last undone canvas operation")
                ToolTip.visible: hovered
                onClicked: project.undoStack.redo()
            }
            ToolSeparator {}
        }
        // ...
    }
}
It is a mix of ToolButtons using images for icons and a custom IconToolButton that is simply a ToolButton that sets FontAwesome as its font family for convenience.
Shortcuts
All of the shortcuts are defined in Shortcuts.qml:
import QtQuick 2.6
import App 1.0
Item {
    objectName: "shortcuts"
    // ...
    Shortcut {
        objectName: "redoShortcut"
        sequence: settings.redoShortcut
        onActivated: project.undoStack.redo()
        enabled: canvasHasActiveFocus && project && project.undoStack.canRedo
    }
    Shortcut {
        objectName: "copyShortcut"
        sequence: StandardKey.Copy
        onActivated: canvas.copySelection()
        enabled: isImageProjectType && canvasHasActiveFocus && canvas.hasSelection
    }
    Shortcut {
        objectName: "pasteShortcut"
        sequence: StandardKey.Paste
        onActivated: canvas.paste()
        enabled: isImageProjectType && canvasHasActiveFocus
    }
    // ...
}
I started writing Slate before Action was introduced, and haven't bothered to clean this up yet. Ideally, each of these shortcuts would be an action in MenuBar.qml, instead of being defined in both Shortcuts.qml and MenuBar.qml.
Each shortcut's key sequence is stored in ApplicationSettings, as they are configurable. Below is a screenshot of the shortcuts tab of OptionsDialog:
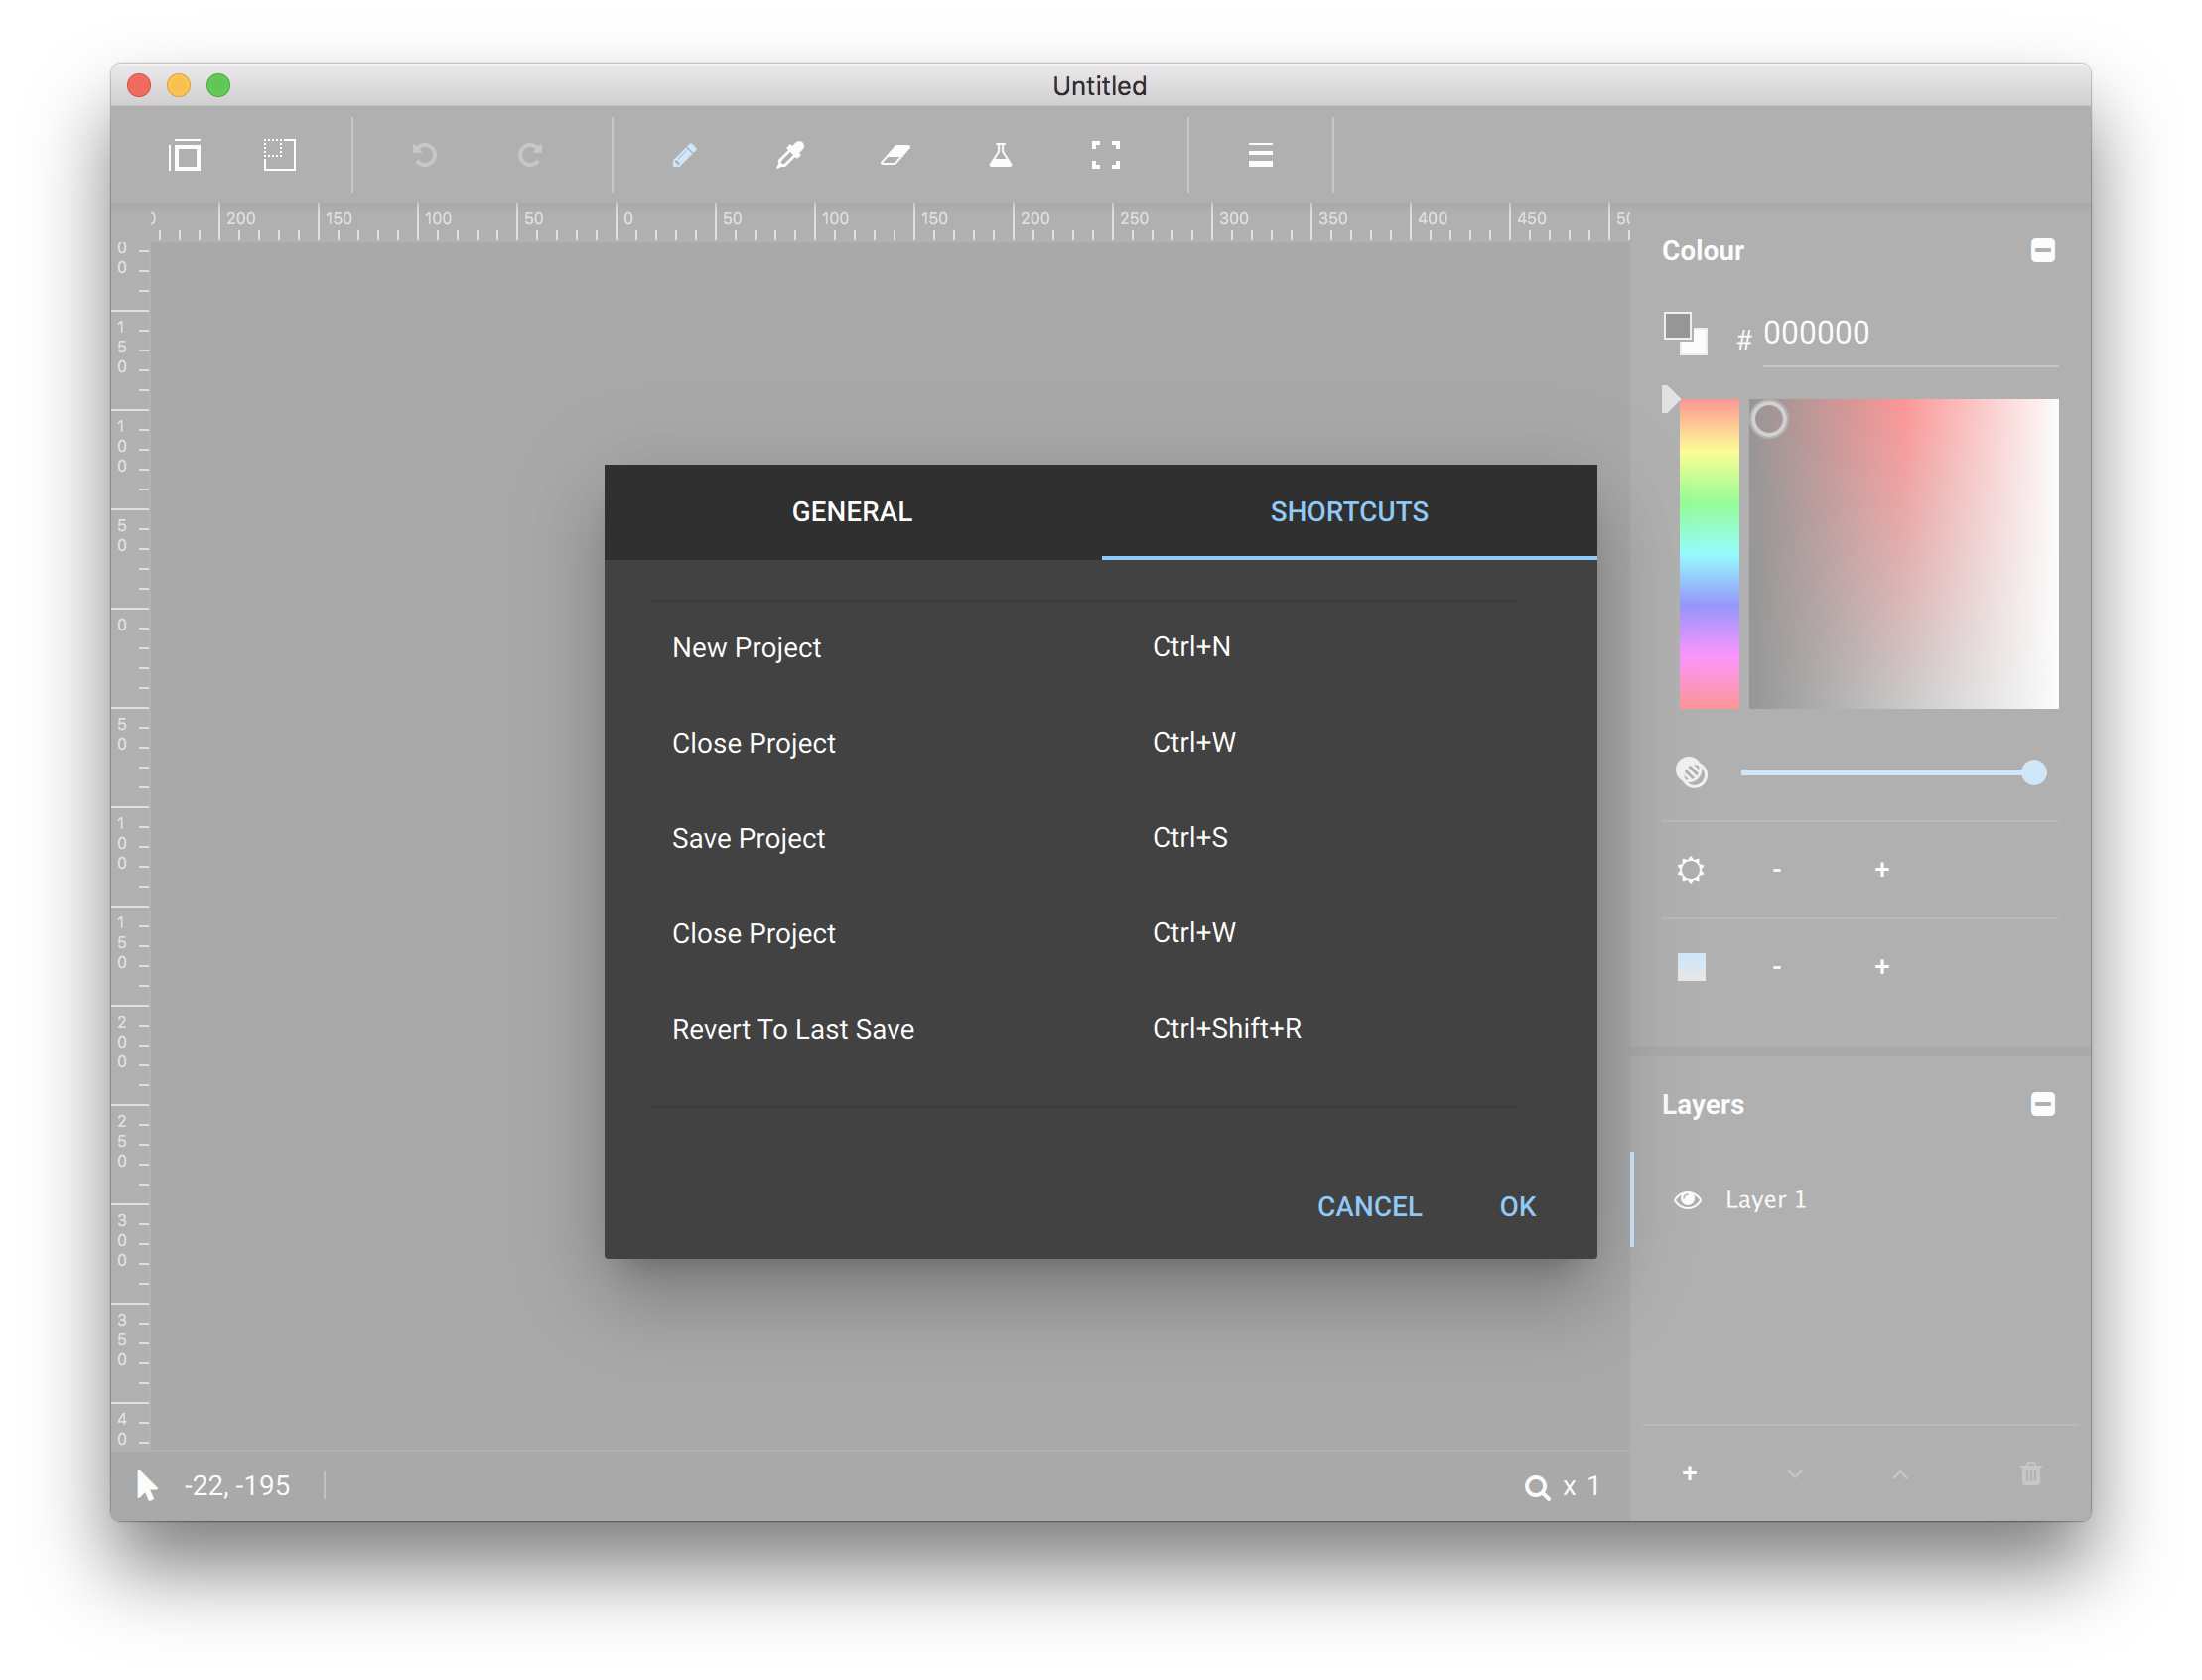
Each shortcut there is represented by a ShortcutRow item. KeySequenceEditor takes care of the actual key editing.
Style
To match its name, Slate uses the Material style's dark theme. I find dark themes more gentle on the eyes, and, in my opinion, the Material style is the best looking style in Qt Quick Controls 2.
In some places I've experimented with supporting other styles, such as the Universal style. I did so using file selectors.
When adding custom UI elements, such as the current layer indicator in the Layer panel, I've made sure to use the accent colour from the active style:

To do this, I use a CanvasColours singleton. The default implementation is for the default style (again, just experimenting), with other styles having their own implementation of the singleton in their specific file selector directories. The Material style implementation is here. Notice that it uses Material.accent.
Testing
I take comfort in auto tests. They're a great reassurance that I haven't screwed everything up. I try to add tests for every new feature. Sometimes I get lazy, but in general I think the coverage is pretty good.
Gritty Details
My goal with the auto tests is to try as much as possible to emulate the workflow that a user would employ. This means clicking buttons instead of just calling the C++ function that the button would have called.
The test case itself inherits from TestHelper, which provides helper functions for common tasks. Here's an example of a test:
void tst_App::disableToolsWhenLayerHidden()
{
    QVERIFY2(createNewLayeredImageProject(), failureMessage);
    // The cursor should be normal.
    setCursorPosInScenePixels(0, 0);
    QTest::mouseMove(window, cursorWindowPos);
    QCOMPARE(window->cursor().shape(), Qt::BlankCursor);
    QQuickItem *layer1Delegate = nullptr;
    QVERIFY2(verifyLayerName("Layer 1", &layer1Delegate), failureMessage);
    QQuickItem *layer1VisibilityCheckBox = layer1Delegate->findChild<QQuickItem*>("layerVisibilityCheckBox");
    QVERIFY(layer1VisibilityCheckBox);
    const QVector<ImageCanvas::Tool> tools {
        ImageCanvas::PenTool,
        ImageCanvas::EyeDropperTool,
        ImageCanvas::EraserTool,
        ImageCanvas::FillTool,
        ImageCanvas::SelectionTool/*,
        ImageCanvas::CropTool TODO: not implemented yet*/
    };
    foreach (ImageCanvas::Tool tool, tools) {
        // Hide the layer.
        mouseEventOnCentre(layer1VisibilityCheckBox, MouseClick);
        QCOMPARE(layeredImageProject->currentLayer()->isVisible(), false);
        // Switch tool.
        QVERIFY2(switchTool(tool), failureMessage);
        // The cursor should be disabled for each tool.
        setCursorPosInScenePixels(0, 0);
        QTest::mouseMove(window, cursorWindowPos);
        if (window->cursor().shape() != Qt::ForbiddenCursor) {
            QString message;
            QDebug debug(&message);
            debug.nospace() << "Expected Qt::ForbiddenCursor for tool " << tool << ", but got " << window->cursor().shape();
            QFAIL(qPrintable(message));
        }
        // Make the layer visible again.
        mouseEventOnCentre(layer1VisibilityCheckBox, MouseClick);
        QCOMPARE(layeredImageProject->currentLayer()->isVisible(), true);
        // The cursor should not be ForbiddenCursor now.
        QVERIFY(window->cursor().shape() != Qt::ForbiddenCursor);
    }
    // Hide the layer.
    mouseEventOnCentre(layer1VisibilityCheckBox, MouseClick);
    QCOMPARE(layeredImageProject->currentLayer()->isVisible(), false);
    // Ensure that we can't actually do anything when the cursor is disabled.
    QVERIFY2(switchTool(ImageCanvas::PenTool), failureMessage);
    setCursorPosInScenePixels(10, 10);
    QTest::mouseMove(window, cursorWindowPos);
    QTest::mouseClick(window, Qt::LeftButton, Qt::NoModifier, cursorWindowPos);
    QCOMPARE(layeredImageProject->currentLayer()->image()->pixelColor(10, 10), QColor(Qt::white));
}
One important thing that I think is worth mentioning is the approach to verifying the success of helper functions. QVERIFY and friends do not work outside of test functions. What you'll see if you try to cause a failure outside of a test function invoked by the test framework is that the failure is printed in the test's output, but does not prevent further execution of the test (it can't, because the macros just return early, which would bring control back to the test function itself). This is a subtle issue that I think deserves some attention.
To get around this, I've copied the macros and removed their "Q" prefixes. As an example, here's VERIFY:
#define VERIFY(statement) \
do { \
    if (!static_cast<bool>(statement)) { \
        failureMessage = #statement; \
        return false; \
    } \
} while (false)
All helper functions must use these macros. It's not as good as having the code within the test functions themselves, because I don't get useful line numbers (the failure points to the invocation of the function, not the position of the failure in the helper function). However, I can make up for this by providing better failure messages in the helper functions, and I'd rather this than having to duplicate the code. Using the first line of the test above as an example:
QVERIFY2(createNewLayeredImageProject(), failureMessage);If a failure were to occur on this line in the createNewLayeredImageProject() helper:
VERIFY(nameTextField->property("text").toString() == QLatin1String("Layer 1"));I would receive this failure message:
FAIL! : tst_App::disableToolsWhenLayerHidden() 'createNewLayeredImageProject()' returned FALSE. (nameTextField->property("text").toString() == QLatin1String("Layer 1"))

..\..\slate\tests\tst_app.cpp(3203) : failure location
As mentioned in the bug report, QCOMPARE can't be easily duplicated, so I also can't see what the actual value is, just the expected value.
If the QVERIFY2 above fails, execution eventually returns to cleanup(), where the failure message is cleared in preparation for the next test.
Project Structure
I took the lazy man's approach to the project structure for the auto tests. Everything needed to build the application is in app.pri. That way, app.pro and tests.pro just need to include it.
... which means that all of the C++ files and resources (QML, images, etc.) are built twice! I would not recommend this, especially for larger projects (Slate is not that big, so it hasn't bothered me yet). The standard, proper, non-lazy way of structuring a project like this is to move the application's C++ and resources into a library, and then use that in the application and tests. One day I'll do it the proper way, but so far I've been much more interested in adding cool features to my application than build systems. :)
Summary
Writing this application has been fun. It was also nice to dogfood Qt Quick Controls 2 in the process, as it's helpful to be able to think like a user of the API.
In terms of things I have learned in the process, the first one that comes to mind is the undo framework.
I hope that this article was interesting. Feel free to explore the code in Slate and use it in your applications. :)