This is the first in a series of blog posts that will explain the basics of texture mapping in Qt 3D Studio. To follow the examples, you need to have a basic understanding on how to work with objects and import assets in Qt 3D Studio. If you have not used Qt 3D Studio before, please spend a minute to browse through the Getting Started section in documentation.
In this first post, we will go through how to apply texture maps to objects in Qt 3D Studio, additionally we will explain and show examples of the most common types of texture maps.
What is texture mapping?
So, what is texture mapping? Basically, texture mapping is applying images to the surface of 3D objects to control properties such as color, transparency, specularity and more.
Texture maps can be used to make objects more realistic and better looking as well as to create special effects.
Included in the Qt 3D Studio asset library you will find a set of different textures that you can use, some of the images used in these blog posts are taken from there. It is of course possible to use any image you like.
Applying texture maps
To apply a texture map to an object you first need to add the object to the scene For example, drag an object from the basic objects palette to the scene.
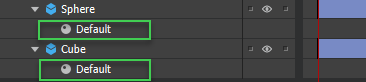
Next, expand the object in the timeline and select the material (Default).
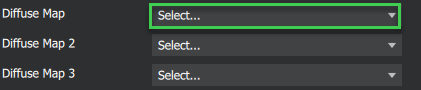
Now you will see all properties, including texture maps, in the inspector palette. To apply a texture map to the object, simply click the Select drop down menu for the desired map property, i.e. Diffuse Map.
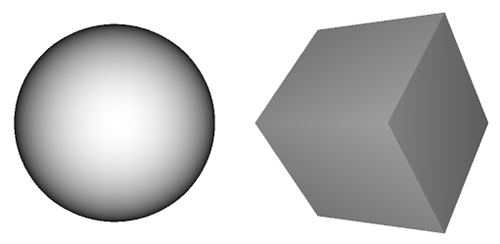
Diffuse Map
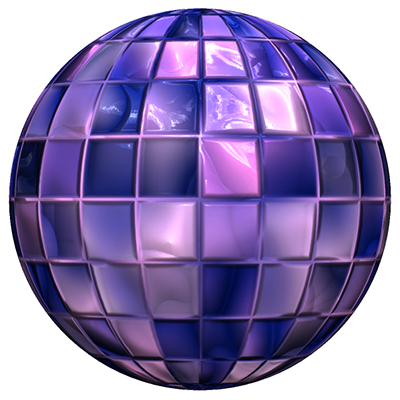
The diffuse map is the most used texture map. Applying an image as a diffuse map to a 3D object will wrap the image around the model.
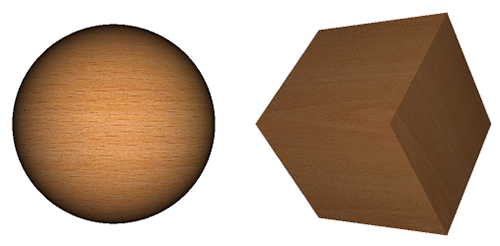
Let’s try this out with a cube and a sphere in Qt 3D Studio. First you will need to import the diffuse map to your Studio project. In this example we will use the Wood7.png from the asset library but basically any image will do.
Once you have added the objects to the scene, select the default material in the timeline palette to display the properties of the objects material in the inspector palette.
Now, for each of the objects, click the Diffuse Map drop down and select the Wood7.png. You should now have a wooden sphere and a wooden cube.
Bump Map
A bump map is used to apply small details (height differences) such as bumps or scratches to a 3D object. A bump map is basically a grayscale image that fakes height differences on the mesh. It does not alter the geometry of the object in any way, if you look closely you will see that a bump map does not change the silhouette or shadow of the object.
Let’s try this on our sphere using bump.png found in the asset library.
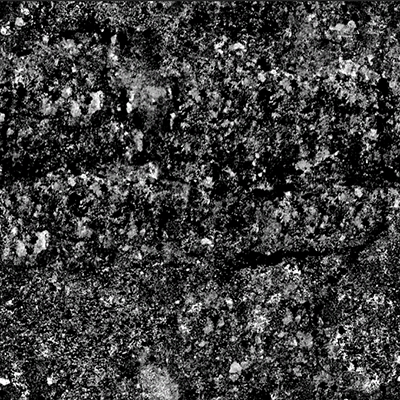
First, remove the diffuse map from the sphere and import bump.png to your project. Then, in the inspector palette, set bump.png as Bump Map for the material of the sphere.
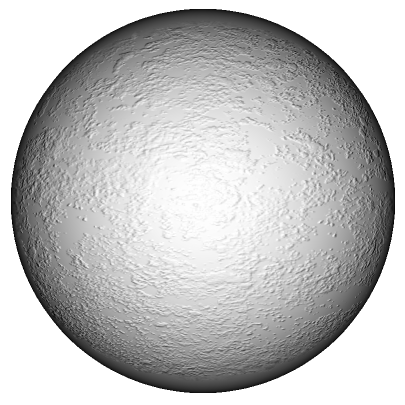
Now we got some structure on our sphere instead of the flat surface. Note that there is a Bump Amount setting for the material which you can use to change the strength of the bump map. A positive Bump Amount value will display black color as the lowest areas while a negative value will display white color as the lowest areas.
Opacity Map
Sometimes called alpha map or transparency map, the opacity map is used to control the opacity of an object. An opacity map needs to be of an image format that support transparency, i.e. PNG or DDS. Transparent parts of the image will render as transparent once applied as an opacity map to the object.
Let’s try adding an opacity map to our sphere, you can keep the bump map there if you wish to. In this case I will use an image I have created myself but there are many transparent images in the Alpha Maps directory of the assets library that can be used instead.
This is the image I am using, a black flower silhouette with transparent background.
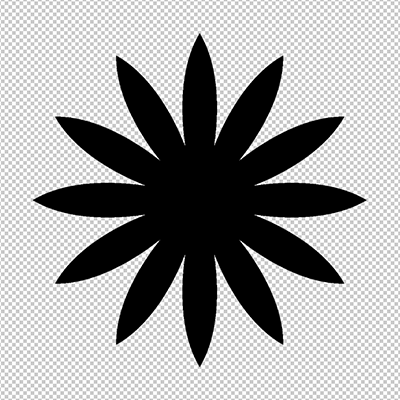
Then I set it as Opacity Map for the material of the sphere, as you can see it wraps around the sphere and display the transparent areas of the images as transparent also on the sphere.
Specular Map
A specular map controls the specularity of an object, in most cases a grayscale image is used but it's possible to use a color image if you wish to add a color tint to the reflections. Black colors on the specular map will add no reflections, the lighter the color gets, the more reflective will the specific area be. A specular map can for example be used if you have a diffuse map showing different materials; some reflective, some non-reflective.
The textures in this example is from www.3dtextures.me, a great online resources for texture maps.
In this example we have applied a tile diffuse texture to a sphere.
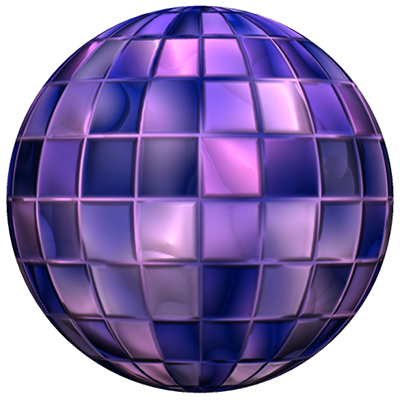
It looks nice, but we need to add some reflections to make it more realistic. In Qt 3D Studio, you make the object reflective by increasing the Specular Amount value (by default it is set to 0) for the material. In this example I set it to 0.1 which adds reflections to the whole object. If Specular Amount is 0, the specular map will have no effect.
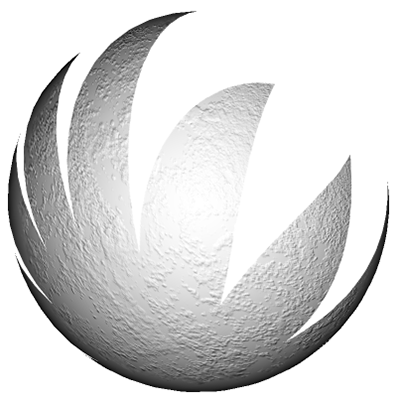
Now it's time for the specular map to fine tune the reflections. This is what the specular map looks like in this case; the darker the color of tha map is, the more reflections will be toned down. Black colors will remove all reflections while white color will leave reflections unchanged. In this case the specular map will add some variations to the reflections, tone down reflections on the side of the tiles and so on.
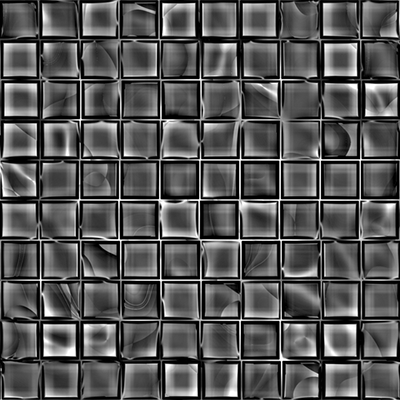
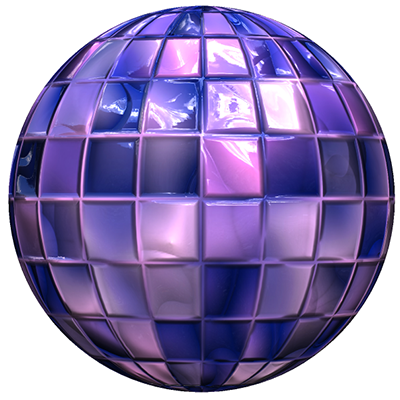
Apply it as Specular Map to the cube.
Summary
In this blog post we had a look at the most common types of texture maps and how you can use them in Qt 3D Studio to improve the appearance of basic 3D objects.
In next blog post in this series we will go through more types of texture maps in Qt 3D Studio.